
How to Start a Professional Blog: Step-by-Step Guide

Disclaimer
Some links may earn us a small commission at no extra cost to you.
Click here to read our full affiliate disclosure.
Disclaimer
We believe in complete transparency with our audience.
Some links may earn us a small commission at no extra cost to you.
Please know that we only recommend products/services we have personally used, thoroughly researched, and genuinely believe can benefit our audience.
We are immensely grateful for every click and purchase you make through these links. Thank you for being a part of our community and for your continued support!
Click here to read our full affiliate disclosure.

Updated on 17/10/2025
Over the years, blogging has evolved from being a hobby to a profitable career path. With the right strategies, dedication, and passion, you can turn your blog into a steady source of income.
In this article, we’ll explore how to set up a professional blog, integrate advertisement strategies, and leverage affiliate programs to maximise your monetization potential.

In particular, these key steps to setting up a professional blog will be covered:
Choosing the Right Hosting Provider.
Domain Registration and Setup.
Installing and Customising WordPress.
Creating Quality Content.
Monetization through Ads.
Maximizing Income with Affiliate Programs.
Optimizing for Success.
How to Start a Professional Blog

Here are the steps to follow.
I. Choosing the Right Hosting Provider
When setting up a blog, selecting the right hosting provider is a critical decision that can impact your site's performance, reliability, and ultimately, your ability to monetize effectively.
Two popular hosting options for bloggers are Bluehost and Namecheap. Let's compare these options and explore the key factors to consider when making your choice.
Comparing Bluehost and Namecheap
Bluehost:
• Bluehost is widely recognized for its user-friendly interface and seamless WordPress integration.
• It offers a free domain name for the first year, making it a cost-effective choice for beginners.
• Bluehost provides 24/7 customer support through live chat, phone, and email.
• With various hosting plans, including shared hosting, VPS hosting, and dedicated hosting, you can scale your hosting as your blog grows.
• Bluehost also offers a one-click WordPress installation, which simplifies the setup process.

Image source: BlueHost Website
Namecheap:
• Namecheap is known for its affordability and straightforward pricing structure.
• It offers competitive hosting plans suitable for different types of websites, including blogs.
• Namecheap provides solid uptime and performance, ensuring your blog remains accessible to visitors.
• Namecheap offers a free website builder and domain name privacy protection.

Image source: Namecheap Website
Key Factors to Consider
1. Pricing: Compare the pricing plans of both hosting providers to see which one best meets your needs.
Keep in mind that the price will vary depending on the type of hosting and the services you require.
2. Performance: A fast-loading website is crucial for user experience and search engine rankings.
Pay attention to the uptime and loading speeds offered.
3. Customer Support: Reliable customer support can save you a lot of headaches in case of technical issues.
4. Features: Consider the features provided in each hosting plan, such as storage, bandwidth, and the ability to host multiple domains.
Ensure the features align with your blog's needs.
Signing Up and Choosing a Hosting Plan
1. Visit the Provider's Website: Go to the Bluehost or Namecheap website to begin the sign-up process.
2. Choose a Plan: Select a hosting plan that suits your blog's requirements. For beginners, shared hosting is usually a suitable starting point.
3. Select a Domain: If you don't already have a domain, you can either register a new one or transfer an existing domain.
Many hosting plans offer a free domain for the first year.
4. Complete the Registration: Enter your personal and payment information to complete the registration process.
II. Domain Registration and Setup

A unique and appropriate domain name assists visitors in remembering your site and also expresses the core of your content.
Choosing a Domain Name
• Reflect Your Niche: Your domain name should give visitors a clear idea of what your blog is about.
If you're blogging about cooking, for instance, a domain like "TastyKitchenTreats.com" could be fitting. Otherwise, you can simply use your name.
• Keep It Short and Simple: Shorter domain names are easier to remember and type. Avoid lengthy or complex names that might confuse potential visitors.
• Avoid Hyphens and Numbers: Hyphens and numbers can be confusing when spoken aloud or typed. Stick to letters to make your domain name more user-friendly.
• Use Keywords: Incorporating relevant keywords in your domain name can help with search engine optimization (SEO) and make your blog easier to find.
Registering a Domain Name
1. Access Your Hosting Account: Log in to your hosting account's dashboard (Bluehost or Namecheap) where you registered your hosting plan.
2. Search for a Domain: Use the domain search feature to check if your desired domain name is available. If it's available, you can proceed to register it.
3. Choose Domain Extensions: Select the domain extension (e.g., .com, .net, .org) that best suits your blog's purpose.
While .com is the most common, other extensions can be suitable based on your niche.
4. Complete Registration: Follow the prompts to complete the domain registration process. You'll need to provide your contact information and make the necessary payment.
Setting Up Your Domain
1. Access Domain Settings: Once your domain is registered, navigate to the domain settings within your hosting account's dashboard.
2. Configure Nameservers: If your domain and hosting are with the same provider, the nameservers are likely preconfigured. If not, you'll need to input the correct nameservers provided by your hosting provider.
3. Connect to Hosting: If you're using the same provider for domain and hosting, your domain should already be connected. If not, you might need to update your hosting account to associate it with the domain.
4. Install an SSL Certificate: An SSL certificate is crucial for security and search engine rankings. Most hosting providers offer an easy way to install an SSL certificate for your domain.
5. Domain Email: A professional email address associated with your domain (e.g., yourname@yourdomain.com) is important. You can often set this up through your hosting provider.
6. Test Your Domain: Once everything is set up, type your domain name into a browser to ensure it is correctly connected to your hosting account.

Image source: Namecheap Website
III. Installing and Customising WordPress
WordPress is one of the most popular content management systems for bloggers. Its versatility, extensive plugin ecosystem, and interface make it ideal for managing your blog's content.
Benefits of Using WordPress
• User-Friendly Interface: WordPress is known for its straightforward dashboard, allowing bloggers of all skill levels to manage content with ease.
• Customizability: Choose from thousands of themes and plugins to tailor your blog's appearance and functionality according to your vision.
• SEO-Friendly: WordPress is designed with search engine optimization in mind, helping your blog rank higher in search results.
• Security: Regular updates and a robust community contribute to the security of your blog.
• Responsive Design: Many WordPress themes are responsive, ensuring your blog looks great on all devices.
WordPress Logo
Installing WordPress
1. Log In to Your Hosting Account: Access your hosting control panel (cPanel) using the login details provided by your hosting provider.
2. Select WordPress: Choose WordPress from the list of available software applications.
3. Configure Installation: Fill in the necessary information, including your domain, desired username, password, and email address. This will be your WordPress admin login.
4. Choose a Directory (Optional): Leave the "Directory" field blank if you want your blog to be accessible directly from your domain (www.yourdomain.com). If you prefer a specific directory (www.yourdomain.com/blog), enter the directory name.
5. Install: Click the "Install" button to start the installation process. Once completed, you'll receive a confirmation.

Image source: Namecheap Website
Customizing WordPress
1. Access Your WordPress Dashboard: To log in to your WordPress dashboard, type "yourdomain.com/wp-admin" in your browser's address bar and use the login credentials you set during installation.
2. Choose a Theme: Navigate to "Appearance" > "Themes" in the dashboard. Browse through the available free and premium themes. Preview and install the one that suits your blog's style.

Image source: BlueHost Website
3. Customize Your Theme: After installing a theme, click on "Customise" under the "Appearance" menu. Here, you can modify colours, fonts, header images, and more.
4. Set Permalinks: Permalinks are the permanent URLs of your posts, pages, categories, and other archive pages on your website.
Under "Settings" > "Permalinks," choose a user-friendly and SEO-friendly permalink structure.
5. Configure General Settings: Under "Settings" > "General," set your blog's title, tagline, and other basic settings.
6. Install Essential Plugins: Explore the "Plugins" section and install plugins that enhance your blog's functionality, such as SEO tools, caching plugins, and social sharing buttons.
7. Create Essential Pages: Craft important pages like "About," "Contact," and any others relevant to your niche.
IV. Creating Quality Content
At the heart of any successful blog lies the content you create. Quality content is the foundation of attracting and retaining readers, building a loyal audience, and ultimately monetizing your blog.
Importance of Valuable Content
• Builds Credibility: Well-researched and informative content establishes you as an authority in your niche.
• Engages Readers: Engaging content captures your readers' attention and encourages them to interact with your blog.
• Drives Traffic: Quality content is more likely to be shared and linked to, which can lead to higher search engine rankings and increased traffic.
• Encourages Monetization: Engaged readers are more likely to respond to your monetization strategies, such as affiliate links and product recommendations.
Tips for Brainstorming Blog Topics
1. Understand Your Audience: Research your target audience's needs, questions, and pain points. Your content should provide solutions or valuable insights.
2. Keyword Research: Use an SEO tool like Mangools to find relevant keywords that are being searched in your niche.
3. Competitor Analysis: Analyse successful blogs in your niche to identify topics that resonate with their readers.
4. Trending Topics: Keep an eye on industry trends, news, and seasonal topics that are relevant to your audience.

Image Source: Mangools Website
Crafting SEO-Friendly Articles
1. Focus Keyword: Choose a primary keyword for each article. This should be a term that accurately represents the article's content.
2. Title: Craft a compelling, keyword-rich title that grabs attention and clearly communicates what the article is about.
3. Introduction: Begin with an engaging introduction that hooks readers and introduces the main topic.
4. Structure: Use subheadings (H2, H3, etc.) to break up content and make it more readable. This also helps with SEO.
5. Valuable Content: Provide useful information, insights, or solutions. Make sure your content fulfils the promise made in the title.
6. Visuals: Incorporate relevant images, infographics, or videos to enhance the content and make it more shareable.
7. Internal and External Links: Include links to relevant articles within your own blog (internal links) and credible external sources (external links).
8. Call to Action (CTA): Encourage reader engagement by including a CTA, such as asking them to leave a comment or share the article.
9. Meta Description: Write a concise and compelling meta description that summarizes the article's content. This is what appears in search results.
Engaging Writing Style
• Be Conversational: Write in a conversational tone to connect with readers on a personal level.
• Use Stories: Incorporate personal anecdotes or real-life stories to make your content relatable and memorable.
• Solve Problems: Address common issues your readers face and provide practical solutions.
• Inject Personality: Let your personality shine through in your writing to differentiate your blog from others.

V. Monetization through Ads
Monetizing your blog through display ads is a popular way to generate passive income while providing valuable content to your readers.
Understanding Display Ads
Display ads are visual advertisements that appear on your blog, usually in the form of banners, images, or interactive media.
Advertisers pay you based on factors such as clicks (Pay-Per-Click or PPC) or impressions (Pay-Per-Thousand or CPM).
Exploring Ad Networks
Various ad networks facilitate the relationship between bloggers and advertisers. One of the most well-known ad networks is Google AdSense.
Google AdSense:
• AdSense is beginner-friendly and widely used due to its vast advertiser pool and user-friendly interface.
• It offers a variety of ad formats and sizes that can be customized to match your blog's design.
• AdSense serves relevant ads based on your content and audience, increasing the likelihood of engagement.
Signing Up and Integrating Google AdSense
1. Sign Up for Google AdSense:
• Visit the Google AdSense website and sign up for an account.
• Provide accurate information about your website, niche, and content.
2. Application Approval:
• Google will review your application to ensure it meets their policies.
• Once approved, you'll receive an email with instructions to set up your ads.
3. Creating Ad Units:
• Log in to your AdSense account and create different ad units (text ads, display ads, etc.).
• Customize the appearance of these units to match your blog's design.
4. Getting Ad Code:
• After creating ad units, AdSense will provide you with HTML code snippets for each unit.
5. Integrating Ad Units:
• Log in to your WordPress dashboard.
• Install a plugin like "Ad Inserter" or "Advanced Ads" to help manage and insert ad codes.
• Paste the HTML code from AdSense into the plugin's settings or directly into your desired ad locations.
6. Placement and Styling:
• Experiment with ad placement to find the balance between monetization and user experience.
• Ensure that ads don't overwhelm your content and fit seamlessly within your blog's layout.
7. Monitor Performance:
• Use the AdSense dashboard to monitor ad performance, click-through rates (CTR), and earnings.
When incorporating ads, keep in mind that moderation is key.
Overcrowding your blog with ads can negatively impact user experience and drive away users.
Prioritise creating valuable content, and use ads as a supplementary income stream.
As your blog grows, you can maximize its earning potential by optimising your ad strategy and investigating new monetization opportunities.
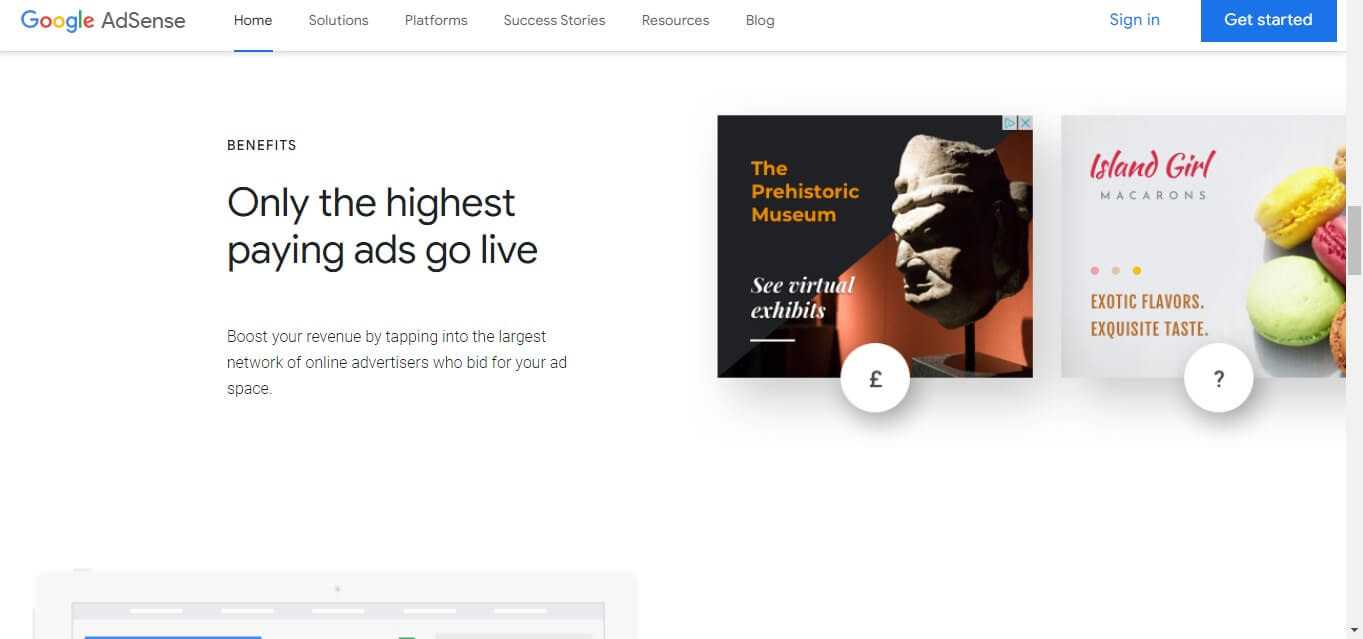
Image Source: Google Adsense Website
VI. Maximizing Income with Affiliate Programs
Affiliate marketing is an effective way to monetize your blog by recommending relevant products or services to your audience.
Understanding Affiliate Marketing
Affiliate marketing involves partnering with companies to promote their products or services. When your readers click on your affiliate links and make a purchase, you earn a commission.
This approach allows you to earn passive income by leveraging your blog's reach and influence.
Product Alignment and Selection
• Relevance: Choose products or services that align with your blog's niche and are genuinely useful to your audience.
• Quality: Promote products you believe in and would use yourself. Trust is crucial in maintaining your readers' loyalty.
• Audience Needs: Identify your audience's pain points and needs, then find products that offer solutions.
Joining Affiliate Programs and Incorporating Links
1. Research Affiliate Programs:
• Search for affiliate programs related to your niche. Many companies, including Amazon, offer affiliate programs.
• Explore affiliate networks like Impact and CJ Affiliate to discover a wide range of products.
2. Apply and Get Approved:
• Sign up for affiliate programs of your choice.
• Some programs might require a review of your blog before approving your application.
3. Generate Affiliate Links:
• Upon approval, access the affiliate dashboard to generate unique affiliate links for products.
4. Link Placement:
• Integrate affiliate links naturally within your content.
• Avoid excessive promotion; focus on providing value.
5. Disclose Affiliate Relationships:
• It's important to disclose your affiliate relationships to maintain transparency with your audience.
This can be done through a disclaimer in your blog's footer or within individual posts.
6. Write Genuine Recommendations:
• Craft honest and informative product reviews or recommendations that highlight the benefits and drawbacks.
7. Track Performance:
• Use affiliate program dashboards to track clicks, conversions, and earnings.

Related Blog Post:Affiliate Marketing - A Guide to Earning Online
Best Practices for Affiliate Marketing
• Diversify Products: Promote a mix of high- and low-priced products to cater to different audience segments.
• Educate Your Audience: Educate your readers about the benefits of the products you're promoting.
• Avoid Spamming: Don't overwhelm your audience with constant affiliate promotions. Maintain a healthy balance.
• Test and Optimize: Experiment with different products and strategies to find what resonates best with your audience.
VII. Optimizing for Success
As you navigate the world of professional blogging and monetization, it's critical to continuously optimize your blog for success.
Website Performance Optimization
• Website Speed: A fast-loading website is crucial for user experience and SEO. Use tools like Google PageSpeed Insights to identify and address speed issues.
• Mobile Responsiveness: Ensure your blog looks and functions well on mobile devices. Google's mobile-friendly test can help you evaluate this.
• Caching: Use caching plugins to speed up your website by storing static files locally on users' devices.
Engaging with Your Audience
• Respond to Comments: Engage with readers by responding to comments on your blog posts. This fosters a sense of community and encourages discussions.
• Social Media Interaction: Be active on social media platforms relevant to your niche. Share your blog posts, engage with followers, and participate in relevant conversations.
• Email Newsletters: Launch an email newsletter to keep your audience informed about new content, promotions, and updates.

Tracking and Analytics
• Google Analytics: Integrate Google Analytics to monitor website traffic, user behaviour, and popular content.
• Conversion Tracking: Set up conversion tracking for affiliate sales, newsletter sign-ups, and other desired actions.
• Performance Monitoring: Regularly review your blog's performance metrics, such as page views, bounce rate, and time on page.
Adjusting Strategies
• Content Analysis: Analyse which types of content perform best and create more of that content.
• Monetization Strategy Adjustment: Continuously evaluate the effectiveness of your monetization strategies. Experiment with ad placements, affiliate products, and other income sources.
• SEO Refinement: Regularly update old content with new information and optimize it for current SEO practices.
• User Feedback: Pay attention to user feedback through comments, social media, and surveys. Use this feedback to improve your blog's offerings.

Image Source: Google Analytics Website
Final Thoughts
Professional blogging offers the potential to generate income while sharing your expertise and passion with a global audience.
By combining dedication, creativity, and the knowledge you've gained from this guide, I think you’re ready to start.
Remember that success in blogging requires perseverance, continuous learning, and an unwavering commitment to providing value to your readers.
Here's to your success as a professional blogger!


Trending
It's possible, even without an SSN.
Discover key qualities to consider when choosing right.
Learn what contributes to a successful business launch.

Deals & Promotions

You can also gain unlimited free access to Exclusive Content and Offers.

2026 © MitchelleO.D. All Rights Reserved.
Disclaimer: As an Amazon Associate, we earn from qualifying purchases. We may participate in additional affiliate networks or programs beyond Amazon.
Visit our Affiliate Disclosure Page to learn more.